
For several weeks I carried my sketchbook with me as I went about our home schooling classes and activities and when I had some time I sat and drew as many different animals as I could think of.

 Occasionally I would look in books or on the internet to find pictures of animals that I could not draw from memory, like an anteater.
I knew these would be stylized animals so I was not going to worry if things looked exactly like real animals, just close enough to get the idea. After I drew a leaf, pomegranate and tree that I was happy with, I scanned all these images into Photoshop. Using the rubberstamp tool I made several stamps of leafs and pomegranates at various angles that I could stamp into positions around the tree branches, all being exactly the same size. I placed the animals around the tree, sizing them up and down and tilting them into a pleasing composition.

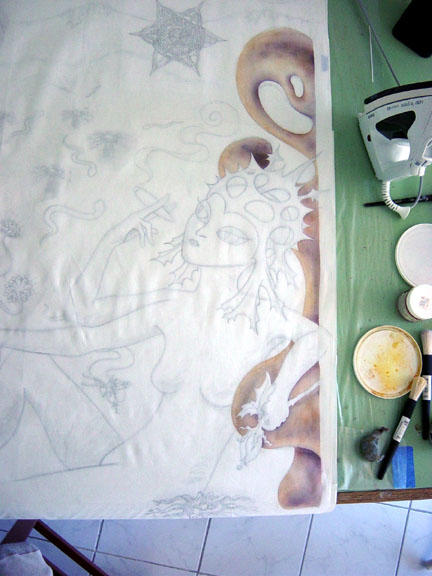
Once this was complete I transferred the file to Adobe Illustrator and sized it up to 60 inches square. Then I printed it out on 8 1/2” x 11” paper and taped the sheets together with clear packing tape. Once it was full scale I made a few adjustments sizing up a couple animals and rotating another to a new position and then I realized I had forgotten to add a snake. How could I forget a snake? I have them in so many of my quilts. I grabbed the tracing paper, laid it over my drawing and drew a snake to fit in an open area in the bottom corner. I then copied this with a Sharpie onto the final drawing. I always use Sharpies on my drawings, because it is so easy to see it through the white fabric.

Next I taped the top edge of my fabric (regular bleached white PDF cotton) to my drawing and LIGHTLY traced the design onto the fabric with a thin lead mechanical pencil.

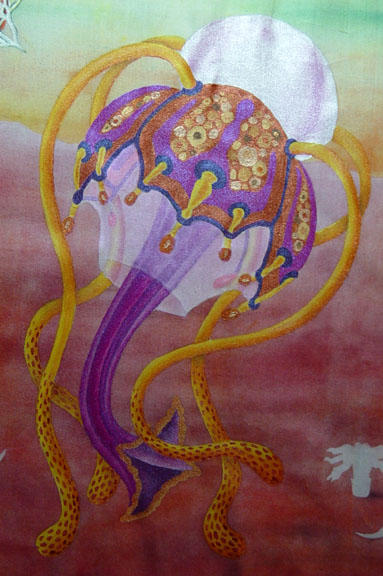
I use Jaquard and Pebeo Setacolor brand textile paints. I mostly used Jaquard opaque paints for this quilt. These paints do not spread on the fabric if you use them the consistency that they come out of the jar (thick creamy) on cotton fabric. Sometimes as the paint sits and starts to dry in the dish while painting I will add a little water, or moisten my brush but usually no extra water is needed.

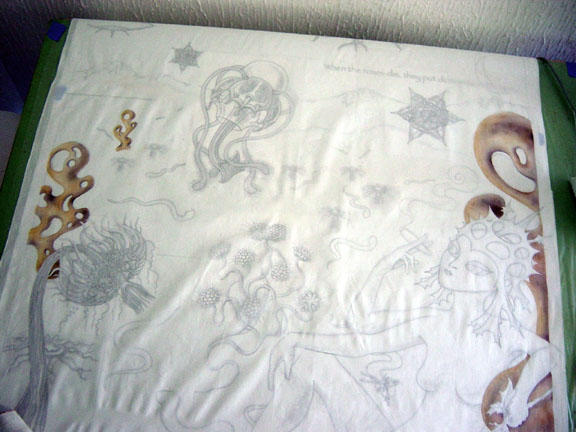
I leave my large paper drawing underneath while painting to protect my table and if I want to make any changes or additions to the design it is easy to add it in as I go. I paint straight onto the fabric on the table. The paper sometimes sticks to the painted fabric so if you don't want to occasionally pick paper off the back of your fabric paint on a covered surface. I like to use dry cleaner bags because they are so thin they will not make bumps under the fabric. Painting over a textured surface will show up in the paint.

When it came to painting the black, I used a tiny brush and carefully painted around each animal about a quarter inch, then filled in the background.

My new Ipod played a key role in the making of this quilt. Because of the detail and precision this painting required I knew I needed something to keep my mind active and engaged while I painted endless hairs and dots.

I listened to 7 audio books while painting this quilt. Three of those books totaled 53 hours. Every hour of painting was wonderful.

Painting Details
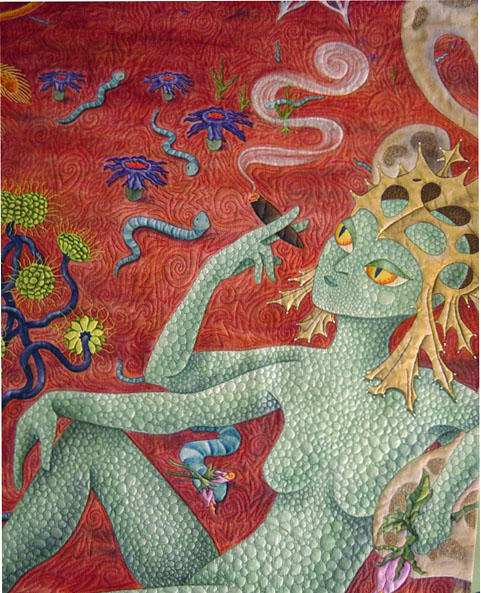
- Arbol de Vida, (tree of life in spanish) was inspired by those beautiful wood carved painted animals that come from Oaxaca Mexico. This quilt is approximately five feet square.


Quilting Details
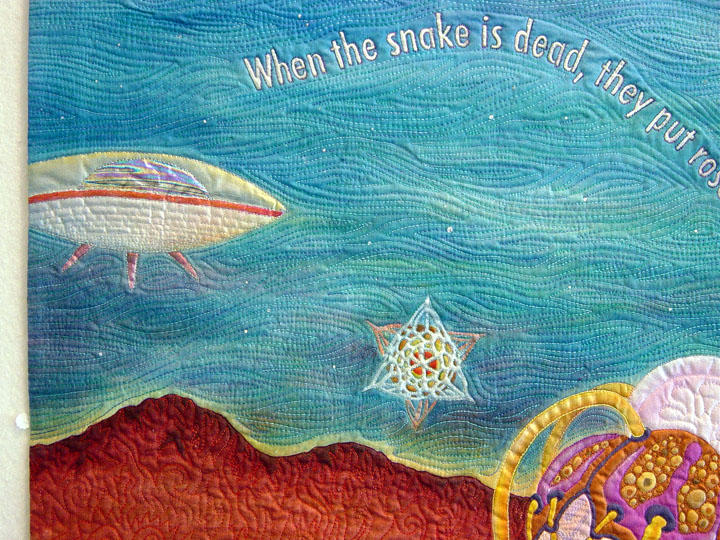
I outline quilted all the animals, tree, leaves and pomegranates. Then I quilted the black background. The black on black quilting is very easy to see on the quilt but unfortunately it does not photograph well. So I am posting a small picture of how the quilt looks in reality and then a big picture that shows the quilting.


I like to do a faced binding and I have been having fun making my labels reflect the design of the quilt.
 I sewed wide yellow ric-rac into the faced binding. I think it adds that little festive touch and helps it to show up against the black drapes in shows.


Once again I was curious what paints you use, so went clicking on your side bar...ta da...the info I was curious about....now a question...What paint brushes do you use? And do you use other things, like pencil erasers, for dots and other details?
Vicky,
I only use brushes when I paint, I find that I do not have enough control when using other things. I don't use top of the line or bottom of the line brushes, but I always buy them from an art supply. Cheap brushes loose hair, and there is nothing worse than picking hairs out of wet paint. They also can loose their points and shape pretty fast, so you loose the ability to make smooth lines. Generally I look for brushes suitable for acrylics, watercolor brushes are too soft. Oil brushes tend to be stiffer, sometimes that is a good thing but in general it is not what I am looking for. I have a lot of brushes, some I have had for 20 plus years.
The shapes and sizes I tend to use most are a flat size 3 and 2, a round size 1, and for details a 00000 and this other one says 10/0. I use those last ones for details like outlining eyes and drawing hairs on the animals in Arbol de Vida, you can see that specifically on the picture of the boar.
I have been a lurker and a fan for a long time now! Your art is amazing! You are so talented! I have a questions, when you quilt, do you use a regular sewing machine or a longarm?
I use a regular sewing machine. I have two older models; a Bernina 1630 that I have been using 13 years and an older Pfaff creative 1475 that I bought used some years ago. Each one has features that I like.
I came across this quilt while looking through a flickr group. I am a painter who recently took up quilting (we're talking RECENTLY- in the middle of my first quilt). I am so fascinated by this process and would love to know where you get your paints. THANKS!
Hi Katie,
I buy most of my paints from Dick Blick. The majority of my textile paints are from Jacquard but I also have Setacolors and some Stewart Gil paints as well. To get certain colors I have mixed the different brands together with no problems. You can sometimes find textile paints at big craft stores too.
Amazing--thanks for sharing your techniques. To get the black background, do you paint it in or work on black fabric?
Thanks, the black is painted. It would be hard to get the bright colors for the animals if it was painted on black fabric.
Brilliant work, Judy! I just had the pleasure of seeing some of your other work at the Denver Quilt festival this weekend. Thanks for sharing your process! Your work is truly inspiring.
When you paint on silk, what type of silk do you use (and where do you purchase it)?
Also, I sometimes find it difficult to quilt through fabric after it's painted. Do you have any tips around technique, needle size, and thread?
Thanks kath,
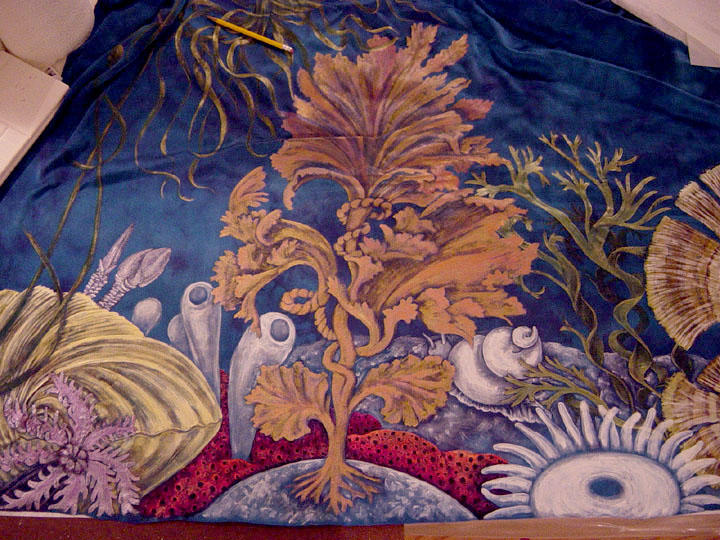
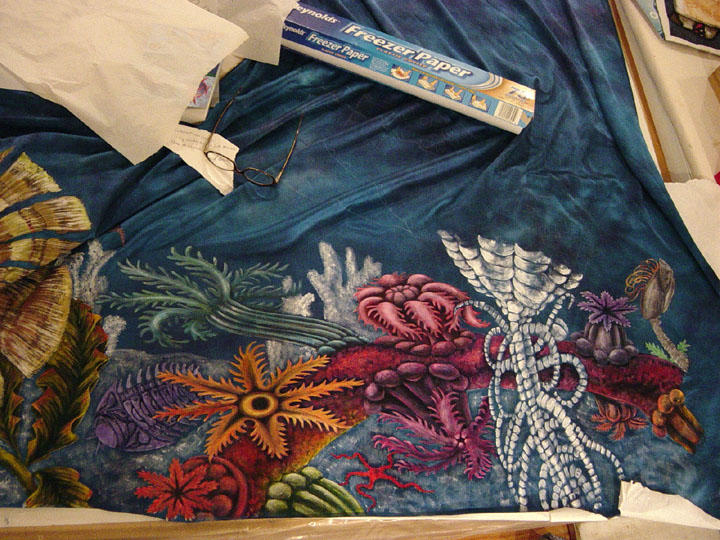
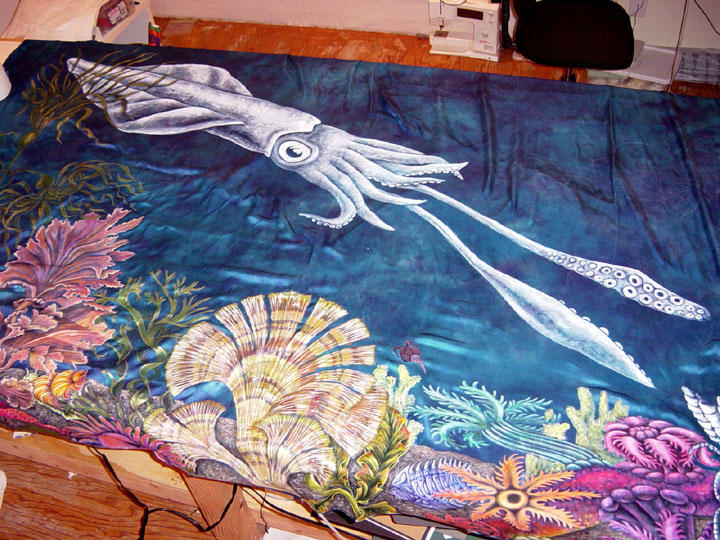
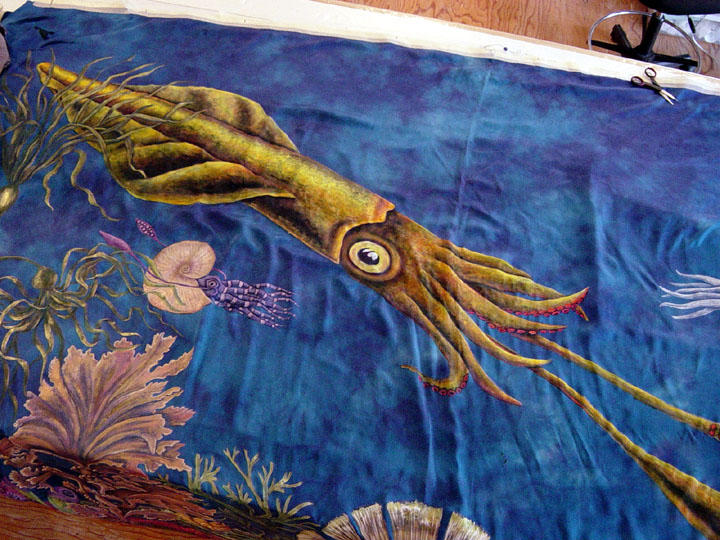
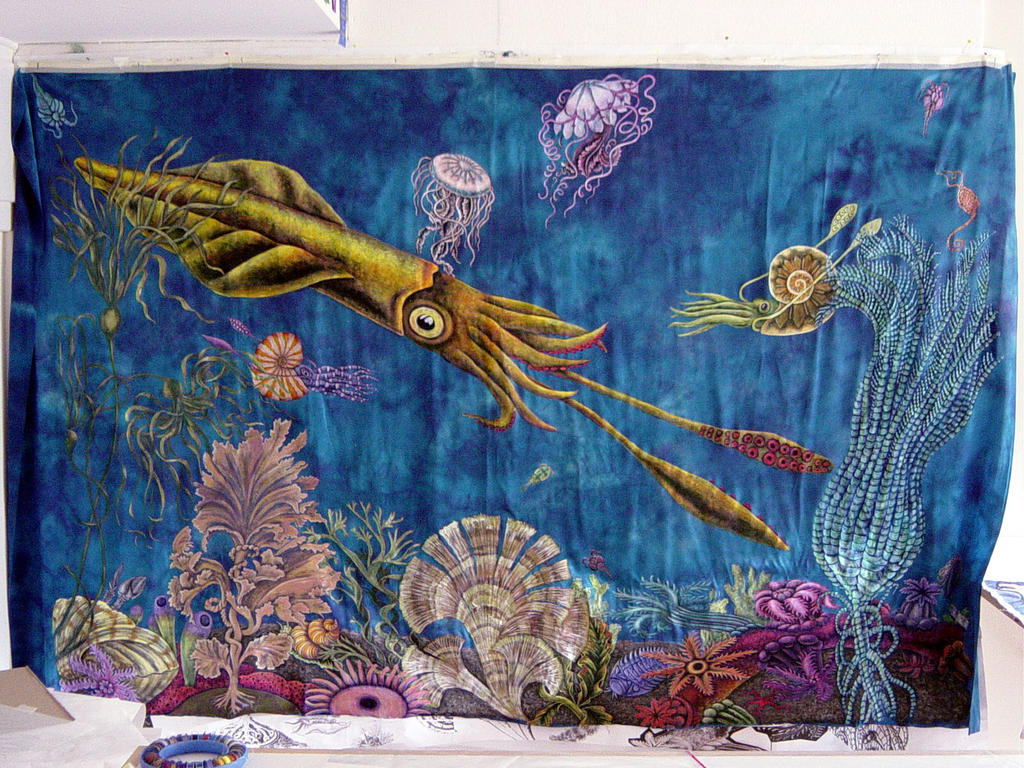
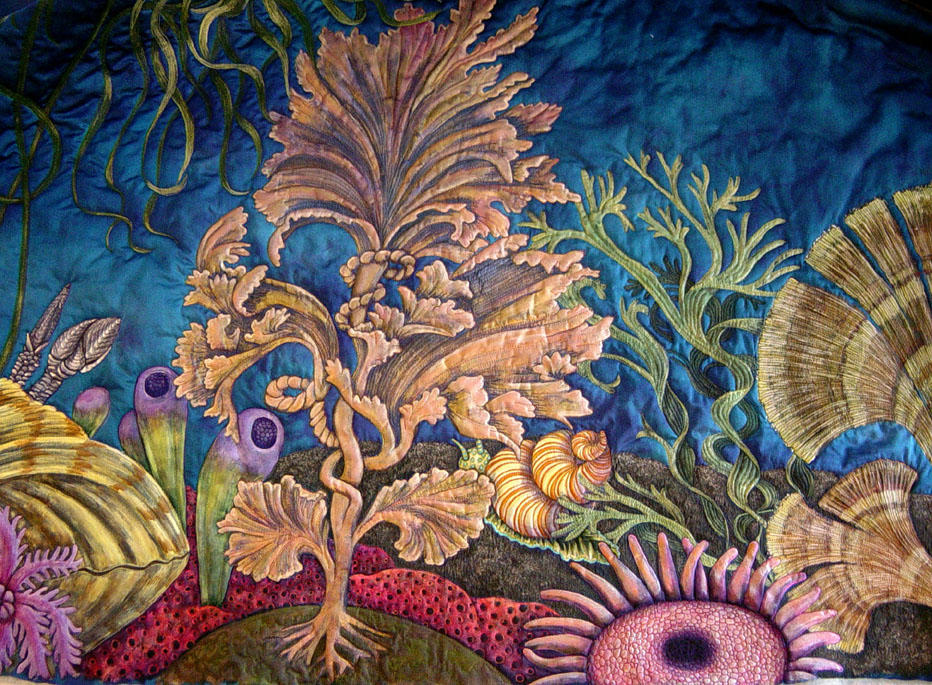
I bought 19mm silk charmuese from Dharma trading for Primordial Sea. If you ever decide to paint on silk with textile paints make sure you go to my post on the making of Primordial Sea to see some of the technical issues i dealt with to save yourself some possible frustration.
I have never had a problem sewing painted fabric. Are you using textile paints? having sharp new needles in your machine may help. I know some sewing machines can be temperamental though.
Usually I quilt with Organ brand titanium needles. Titanium stays cooler and is easier to use with specialty threads, but I like them because they do not snap off like other sewing needles if you hit the throat plate. They just bend up in a hook shape. I think they may stay sharp longer too.
The thread I use most often is Superior Rainbows. I love the colors and sheen, similar to rayon but stronger since it is polyester. I like Madeira polyneons too.