I am working on making a couple small canvas books with copper metal covers. I am using 4 inch square
copper metal, it is a heavier weight metal than the aluminum I use for
Fiesta Ornaments.
I have drawn several designs to use for front and back covers for two books, one titled Flora, the other Birds & Bees.

I begin by taping the metal to a foam mat and then taping the drawing in place over the metal. I transfer my image to the metal by tracing over my pencil lines with an embossing tool. I remove the paper and use the embossing tool to deepen the lines on the metal and add details by working on the front and the back side of the metal, creating dimension.

On this piece of copper I made a small outline around my whole design and filled in the background with stippling by tapping the point of the tool repeatedly over the surface of the metal. This helps the main design stand out from the background.

I found the best product to color metal is
Adirondack Alcohol Inks. You can apply inks using a felt pad or paint brush. I wanted to paint color in specific areas so I used a brush to apply the ink. You don't need much when working with the inks, just drop a few drops of ink onto a paint tray and use a paint brush to apply the ink to the metal.

The ink goes on very bright. If you decide that you want less color, dip your brush in a little bit of the
Alcohol Ink Blending Solution and go back over the area previously painted and the color becomes lighter as it removes the ink. Or you can add the blending solution to the ink on the tray and lighten it before painting it on the metal.
The inks dry very quickly and can be reconstituted in the tray by adding a little blending solution. To rinse my brush between colors I dipped it in the alcohol blending solution and wiped it on a paper towel.

On the copper design with the waterlilies I lightened the ink to make a soft pastel tint on the metal and I painted the ornate floral design brightly to look more like the metal ornaments you see in Mexico. Two very different looks easily achieved using the same inks.
This is the bee panel partially done. In this photo I have gone over all my lines on the front side of the metal with the pointed stylus and have begun adding some stippling with the tiny ball stylus to the background on the left side. This helps the image to pop up and be defined.

In the next photo, the metal design is finished. The raised areas of the design are worked from the back side of the metal. On the bees wings and the leaves, I used a large ball shaped stylus to give extra dimension.

The
tool kit from Walnut Hollow has a lot of different metal working tools to add texture and shaping to the metal. I have only used a few of the tools so far as I figure out how each one can be used. It is an awesome little kit with a ruler, scissors, two tool handles with multiple tips that screw into both ends and a couple plastic embossed border shape plates that metal can be burnished over with a paper stump. I like to make my own designs , so I haven't used those, but they are nice patterns. All in all it is everything you would need to do some serious metal work.
This is a design I made on a piece of copper metal using the
Alcohol Inks, the
felt pad tool and the
blending solution. Here is a great little
video with
Tim Holtz demonstrating alcohol inks. This is the method I used to apply the ink here.
 Making the canvas book
I began by tearing canvas into 4" x 8 " pieces and painting both sides with gesso. I think if I were to start again I would tear them into 4 " x 8 1/2" pieces to allow for the bulk of paint and collage. When the pages were folded in half the book got fairly fat and the pages were a little short in width.

I painted the pages with fluid acrylic washes.

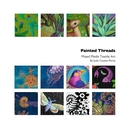
These are the semi finished pages for two books, the blue on the left will be Birds & Bees the yellow on the right is Flora.

There are images that are drawn, painted and transfered onto tea bags, pieces of rice paper, printed tissue paper, wrapping paper, pieces of painted fabric, scraps from other projects, transfers on fabric, painted canvas and a sewing pattern. All adhered with gel medium and machine stitching.

I folded the canvas pages in half and clamped them to help set the fold.

I tore 4" x 2" strips of canvas to use on the binding. Since the canvas was not painted I did some zigzag stitching around the edge, then positioned it over the center of the stack of pages, taping it in place to secure it for stitching.

I stitched through the four layers on my Bernina sewing machine (my Janome would not sew through the bulk).

I clamped the stitched book again to help it hold the fold.

Walnut Hollow sells a very strong double sided
tape to adhere the metal to other surfaces. I found that it will even stick to canvas. I attached the tape and burnished it well to the canvas and then peeled away the paper backing to stick it to the metal, burnishing it to make a good bond with the metal.


I finished the binding by adding some cloth book binding tape.
 The Finished Book

I will give a brief description of the materials used on each page.
On the first page there are leaves cut and painted from a phone book page with a leaf cut from a leftover of my mixed media quilt
Illustrated Document No. 1.
The sprout was painted with textile paint on cotton fabric and machine stitched to the canvas. On the next page black and white tissue paper collaged with gel medium and left overs from a mixed media
vessel stitched on top.

Collaged, painted paper overlapped by painted flower on the canvas.

The center page is rust dyed silk organza from
Jane LaFazio that I drew floral images on with a permanent marker.

Dark tea stained tea bag drawn on with permanent marker.

A few more leaves from the vessel stitched over black and white tissue paper. Opposite: flower and leaves cut from colored art papers and collaged with gel medium.

Tea bag drawn on with a red marker collaged over a paper image. I used the stitching from leaves on the other side of the page as an outline to paint leaves and I added a strange bug I created in Photoshop printed on paper with some washes of acrylic paint.

Old engravings printed on paper and painted with fluid acrylics, the leaves were cut from painted fabric leftovers.

I keep a bag with all my scraps from leftover paintings and mixed media work, to use on new mixed media work.

The end.


